our weekend adventures

friday

img_2801
in case you missed it, i did a little ‘a work day in the life of me‘ over on my snapchat
// @jaevas. sorry if you were annoyed by it, but it was really fun to do that, ya’ll got to see where i work, what my daily shenanigans are as a working woman and then a momma bear/wife afterwards!

img_2768
something else exciting happened…i hit 199 followers on the good ol’ blog! once that bad boy hits 200 i will be doing an awesome giveaway of all of my favorite things!
i’m thinking, hair care, candles, makeup, jewelry…the whole 9, y’all!
thank you so much for your continued support!
img_2802
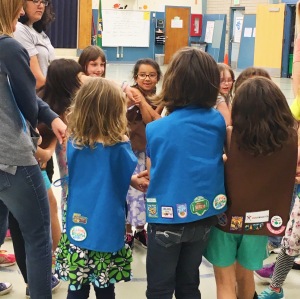
another girl scouts meeting and another friendship circle! this song is so catchy…”a circle is round, it has no endddd, that’s how long i want to be your friend…” i wake up singing that song…

img_2803
after girlscouts, we came home and tended to all of our plant babies. look at how big our hydrangea bush is getting!

saturday

img_2780
cale had to work {again} so jaz and i went and explored hobby lobby and targé. and of course, per the norm, we stopped and had phò.
we.are.addicted.

img_2811
we got to babysit this little rugrat while her mama & papa went on a little date night! she is such a little character! she is starting to say little words and gosh darnit, it is the cutest thing ever!

img_2805 img_2804
after a little teeny meltdown, which, can i just go off on a tangent here?

[is it weird that i was totally okay with it? i loved being able to comfort her and it just brought me back to when little jazmina was teeny tiny. i forgot how much i loved rocking her to sleep, scratching her back and playing with her hair. while she still loves when i do that {minus the rocking part} it’s just not the same from when she was a baby/toddler. 
~le sigh~ that time will come soon enough {not too soon though}  ]

anyway! after i got her to sleep {aaron & misha} came home and of course we played a little catan! and i kicked butt! it was my first win, in the many games we have played, so i was so excited! also, the beer in the picture….hands down the best grapefruit beer…EVER!

img_2806
i’m sure i have mentioned in a lot of my previous posts that misha might be the craftiest person i know. she personalized my kate spade newlywed tote {here}, she hosted a beautiful friendsgiving {here} not to mention all of her diy stuff on her blog {here}! but now she has started her very own business!

⇒ the petite flag shop ⇐ 

i now have three… {this one} is at my office, so all of my catty co-workers can read it everyday and maybe be a little nicer {at least to me}
{this one} is in my home…because, obviously.
but the one pictured is very very special, this flag supports misha & aaron’s niece, a beautiful little girl who is battling cancer. you can read all about her journey and follow along {here} and the direct link to purchase this flag is {here}.

i received mine and it is beautiful!

sunday

img_2809
this is my life every sunday. it never ends.
never.

img_2807
cale wasn’t feeling the best, so jaz and i left him to take a nap while we grocery shopped. these clouds were a bit ominous. it’s rare to see clouds this dark. eek!

img_2808
came home to the cutest little cuddle puddle!

img_2810
uhmmmm…can we just…adele you are amazing! when i downloaded the album{the day it was realeased!}, i was instantly drawn to this song. it’s upbeat, spunky and of course amazing {it’s adele…duh} so when i saw that this was her next single and that this was the video…holy balls. yes! everything about it, yes! girlcrush, for sure, ya’ll!

img_2798
and because it was cold and rainy, some turkey chili was necessary! email me and let me know if you want to see the recipe!

well, it was a jam packed weekend yet again!
the weather was poopy though which was a bummer. we only got a little work done to the deck.
but we are gearing up for a road trip to coeur d’alene for the memorial day weekend and we are so excited!
what did you do this weekend??

always,
-jess

a tasty series : cheeseburger cups

WELCOME BACK TO BLOG DIABEETUS!
aka – our first husband and wife blog series!

today’s recipe trial and review is…

cheeseburger cups

yes, that is right, mother-fluffin cheeseburger cups!

IMG_7288

what you’ll need:
refrigerated biscuits
1 pound of either ground beef or turkey (i always cook with turkey so that’s what i used)
1/2 cup ketchup
1 tsp worcestershire
1 tbsp mustard
2 tbsp brown sugar
small slices of your choice of cheese
a variety of toppings…you choose! we chose tomatoes, pickles, onions and avocado

let’s do this!

preheat your oven to 400°

IMG_7290

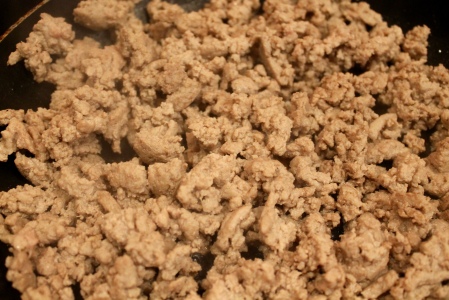
step 1 }  brown your meat, mine will look a little different because i used turkey.
step 2 }  once browned, add the ketchup, mustard, worcestershire and brown sugar.

IMG_7295

step 3 }  take your biscuit and flatten it out in your palm first then stick it in the cupcake pan, making sure to create a little bowl for the meat.

IMG_7296

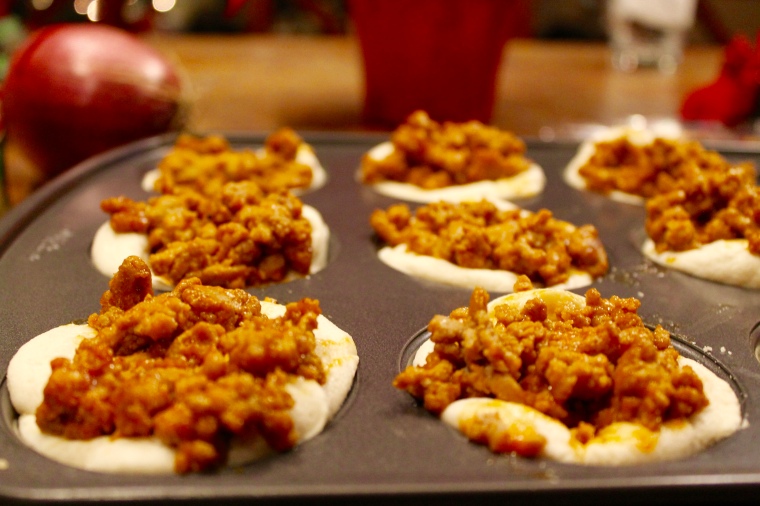
step 4 }  now add your meat, you can be generous!
step 5 }  pop these into your preheated oven for about 10 minutes or until your biscuits look golden brown

IMG_7299

step 6 }  add your cheese and pop em’ back in for another 3 or 4 minutes

IMG_7303

step 7 }  in the meantime, cut up your toppings! try not to eat as many pickles as i did, eek!

IMG_7304
yummy cheesy goodness!

now add your toppings

and…..

IMG_7306

VOILA!
adorable cheeseburger cups!

so far tasty is 2 for 2 and we won’t stop…can’t stop, won’t stop?
if you missed our last trial and review i linked it below and will continue to do that until we stop this series.

a tasty series :
mini oreo cheesecakes

thanks for stopping by!

always,
jess & cale

a tasty series : mini oreo cheesecakes

hello and welcome to blog diabeetus.
haha just kidding {kinda}

in case you don’t have a facebook {i have trust issues with people that don’t} then i will fill you in on something my husband has stumbled across…

11217988_1617143701871606_8333056044163437299_o

→  buzzfeed’s tasty  ←

it’s basically a 10-15 second video of a delicious, heart attack causing, but again, so delicious recipe.
and my husband watches every one and usually posts them to my wall so i know what to stop at the store for, on my way home.
-_-

i recently saw one and immediately regretted what my salivary glands were doing and i knew, because of my impulsiveness, that i would be stopping at the store to pick up everything i needed.
that my friends, was this glorious, mini oreo cheesecake goodness.
it had me at oreo. 

so to clue you in on why i am calling this the ‘tasty series‘ :
cale has tried two different recipe from this and they came out superb. i have tried just this one that i am about to show you and it knocked people’s socks off!
so we decided that we are going to do a husband & wife mini-series. basically of us getting fat on carb saturated recipes.
ENJOY!

***
obviously my disclaimer is that these are not my recipes and
the purpose of these posts are just for fun and to review them.
{please don’t sue me}
***

oreo cheesecakes!

what you’ll need:
16 oz softened cream cheese
1/2 cup sour cream
1/2 cup sugar
1 tbsp vanilla extract
2 eggs
package of regular oreos {not double stuff}


LET’S GET FAT!

preheat your oven to 275°

IMG_7265

1 } mix the cream cheese, sour cream, sugar, vanilla and eggs together in a bowl. it’s best to do it when your cream cheese has softened.

IMG_7266
should look something like this

IMG_7267

2 } line your pan with some cupcake liners. AND THEN…{name that movie!}

IMG_7269

3 } drop some oreos in. use all the will power in the world to not pop one in your mouth. you already did it, didn’t you? that’s okay…me too. now use a large spoon to scoop the concoction you created atop of the oreos. go ahead and fill those bad boys up to the brim.

IMG_7275

4 } separate about 10 oreos, meaning scrap off the filling. you will only use the actual cookie part. you can either break the cookies with your hands or just take a big{er} knife and chop chop chop. something similar to ⇑ is what you want.

IMG_7276

5 } sprinkle the oreo chunks to the tops of the cupcakes. stick these in your preheated oven and let them bake for about 22 minutes. when ready, let them cool to room temperature, then place them in the fridge for 2-3 hours.

AND THEN….

IMG_7280

OREO CHEESECAKES!!!!

IMG_7281

DELICIOUS…

IMG_7286

…AND INCREDIBLY FATTENING, CHEESECAKES!

not going to lie though, i ate about 4 or 5 of them.
so so good!

have you guys tried any of tasty’s recipes?
if so which ones?? i would love to see or hear about your experience!

i hope you guys enjoyed this, there will be lots more recipes to come from the new
mr & mrs!

till then!!

always,
chef jess

delicious turkey wraps

and a happy hump day to you fine folk!
it’s recipe time and today i’m talking about yummy healthy turkey wraps!
with a little over 3 months until the wedding, i am trying to eat healthy-ish, and these were so easy!

let’s go!

what you’ll need:
large tortillas {i used wheat}
fresh turkey from the deli {boar’s head is the bomb}
homemade ranch {use low fat mayo}
lettuce
tomatoes
avocado
red onions
low fat pepper jack shredded cheese

IMG_6051 look at how delicious this looks! i ate almost half the stack before i actually started making the wraps…fresh turkey is the best!

IMG_6053 alrighty, chop all those veggies up. the lettuce, tomatoes, avocado and onions.

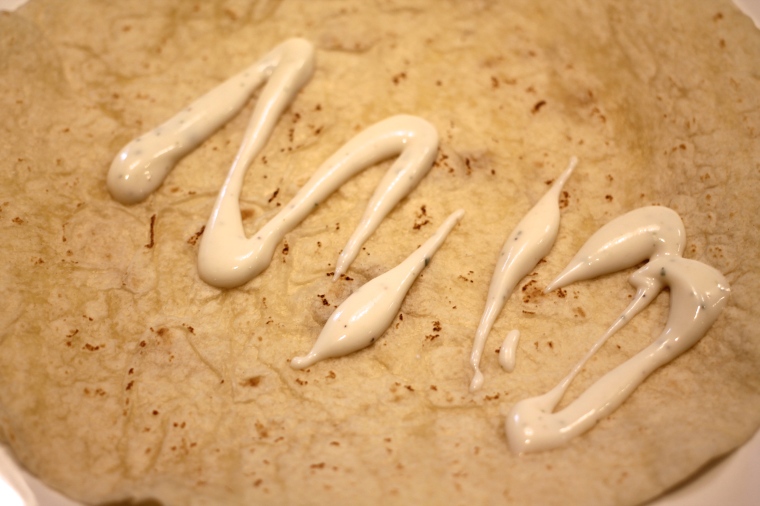
IMG_6058 after you heat the tortillas up, either in a skillet or as hispanics call it…a comal, add a few lines of your ranch you made. you don’t have to make it but low fat ranch store bought is yucky tasting.

IMG_6054 add just a little bit of lettuce. remember that you have to roll this up so don’t use too much.

IMG_6059 add your turkey!!

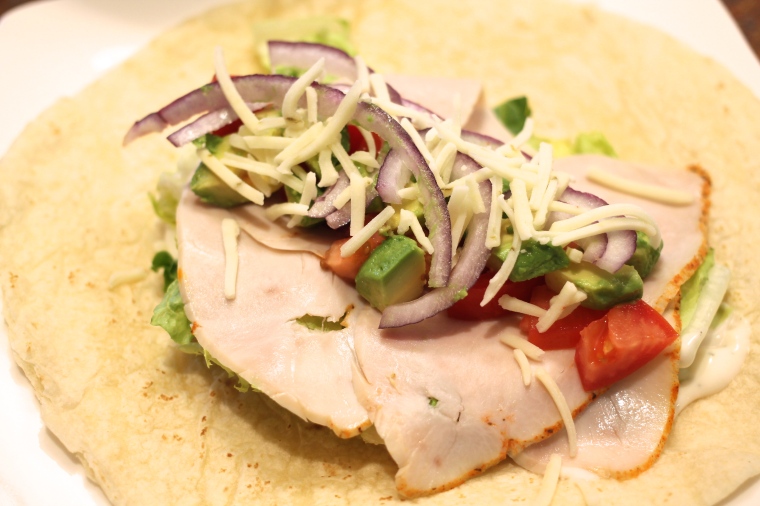
IMG_6060 now this is important, you must add the following toppings in this exact order…tomatoes, avocado {extra if you know what’s good for you} onion and finally cheese. BAM!

IMG_6062 roll once, tuck in the sides and then keep rolling. don’t be afraid to roll it tight. if you heated the tort correctly, it won’t break.

IMG_6064 now cut in half and go to town! and by town i mean eat it…eat it all.

IMG_6067

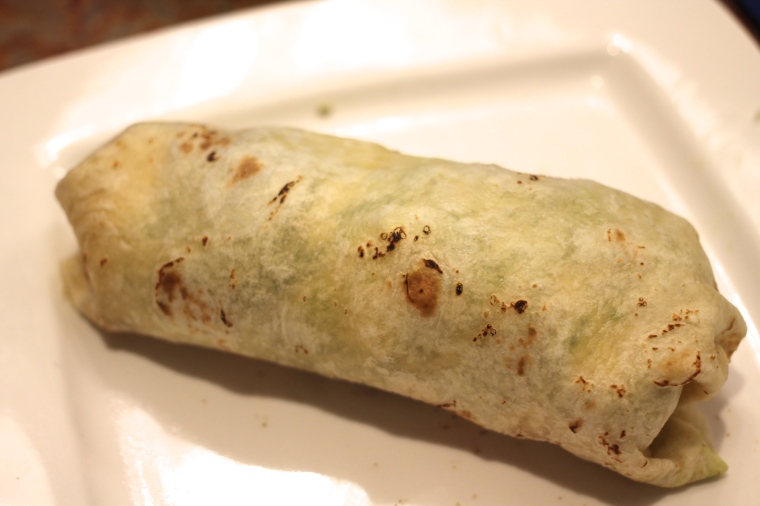
i made cale’s a little more loosely. more like a burrito, if you will. still just as yummy, just make sure to hold the bottom!

and VOILA! yummy deliciousness!

i hope you have a great week!
thanks for stopping by!

always,
chef jess!

7 layer yumminess!

H A P P Y  C I N C O  D E  M A Y O

ARRIBA ARRIBA!!
i really wish y’all could hear me say that…i’m the whitest mexican ever!
given the festive holiday and the great food that comes with it, i thought i would make a 7 layer dip to take to a neighborhood party we’re going to.
but instead of doing a huge dish i wanted to do individuals because if you’re like me, you love to double dip.

vamanos!

what you’ll need:
9 oz clear plastic cups
piping bags
refried beans
guacamole
2 avocados, 1 tomato, 1/3 cup cilantro, 2 tbsp lime juice,
1/4 cup onion, 1/2-1 jalepeno, salt
sour cream
salsa
shredded monterrey jack cheese
diced tomatoes
green onions

IMG_5805 i only used 9 cups. if you do make more be sure to up your quantities on each ingredient.

IMG_5806 {step one} scoop some refried beans into a piping bag, snip the end off {big enough for chunks of beans to get through} and pipe it into the cups.

IMG_5807 each one should be filled about an inch high.

wait! make the guacamole!!!

IMG_5808 mash those acovados {yes that was intentional}

IMG_5809 dice them tomatoes and toss em in.

IMG_5811 finely chop the cilantro. toss it in!

IMG_5812 dice the jalepenos…make sure to use a glove if you’re a big baby like me!

IMG_5815 dice those tear jerking onions…have some goggles? use them.

IMG_5814 add some salt… not too much, just a pinch!
now mix mix mix

back to the dip!

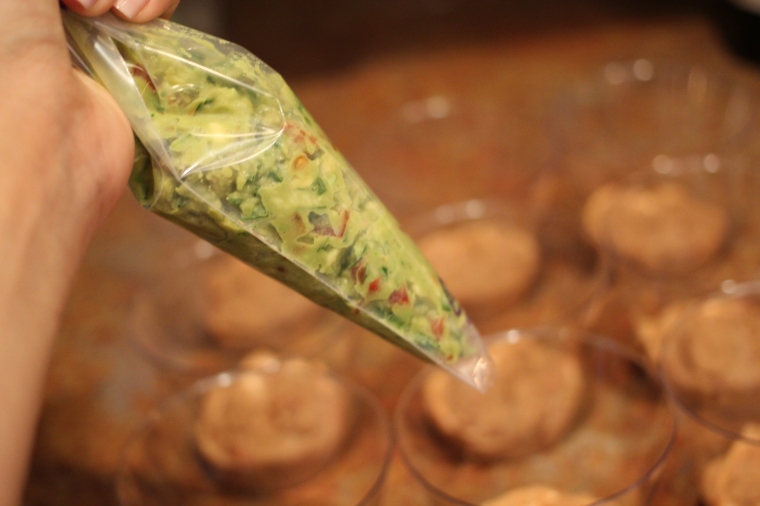
IMG_5816 pipe some guac into the bag and pipe it onto the refried beans.

IMG_5817 remember only an inch.

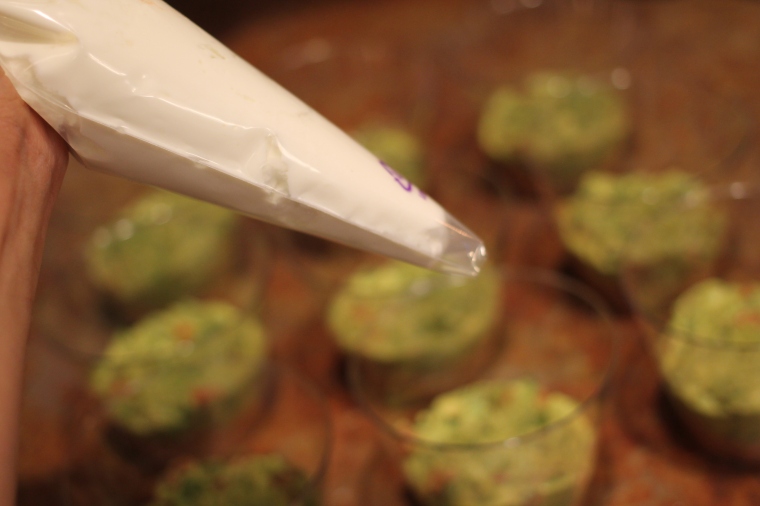
IMG_5818 scoop some sour cream into a bag and pipe that in on top of the guac…

IMG_5819 how much? oh just an inch.

IMG_5820_Fotor
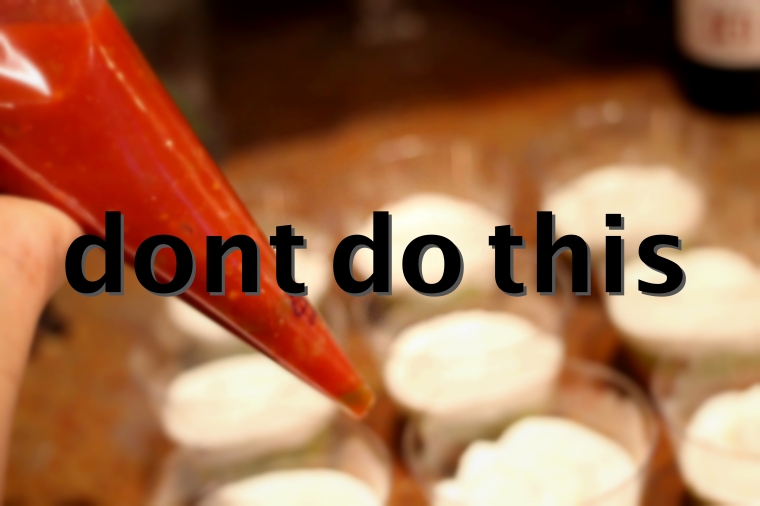
 now for the salsa…this was a disaster. i would NOT recommend using the piping bag…just spoon it in there.

IMG_5823 so festive!

IMG_5824 add the cheese, chop some tomatoes & green onions thennnn…

IMG_5827 add some kind of festiveness and you got yourself some awesome treats to take to a cinco de mayo party!

have a fun and safe cinco de mayo everyone!!

always,
-chef jess

homemade chicken noodle soup

happy thursday, everyone!
i wasn’t going to post this until tomorrow but i thought that since i’m sick in bed today, it was more appropriate to post it now.

i made this monday night because cale was sick. i’m convinced that he gave it to me but in reality it’s probably our pesky allergies. any who, he was congested, stuffed up and his throat was killing him. when i called him at lunch he asked if i could make my chicken noodle soup, how can i say no to that sicky {but kinda hot} voice?

this is seriously the easiest recipe to make. so easy i only have two pictures to go with it.

what you’ll need:
1 tbsp unsalted butter
1/2 cup chopped onion
1/2 cup chopped celery
1 cup chopped carrots
1-2 cloves of minced garlic
7 cups of chicken broth {4 cans}
1 3/4 cups of vegetable broth {1 can}
1/2 pound of cubed chicken breast
1/2 tsp oregano
1/2 tsp basil
egg noodles

IMG_5691 {step 1} chop your carrots, celery, onions and throw them in a pot along with the butter and sauté until soft {about 5 minutes}. meanwhile, mince your garlic & start your egg noodles, follow the cooking directions on the packaging.

{step 2} cube your chicken breast, i didn’t take a picture of this because i have decided raw meat looks nasty, haha.

{step 3} add your garlic in with the veggies after your vegetables are soft, stir for about a minute. then add your broth, chicken and spices.

{step 4} bring to a boil then lower the heat, cover and simmer for 30 minutes.

** i don’t like to add my noodles in until it is served in bowls. i feel like if i add them before it is served, the broth can get really starchy. so i keep them separate but that’s totally a personal preference. 

IMG_5699

{step 5} add as many noodles as you want and spoon some nice, hearty soup in and voila! you have yourself a sickness curing, big bowl of yummy goodness!

this is the best stuff to freeze and save for later. if you do freeze it, obviously, add the noodles in. it will freeze the starch right in!

let me know if you try it out and send me some pictures!

always,
-jess

original recipe {here} just a bit tweaked 

homemade chipotle bowls!

this is my all time favorite thing to make! mainly because i’m obsessed with chipotle but also because it’s relatively easy. i say relatively because it’s a lot of multi-tasking.

here we go! hope y’all enjoy!

what you’ll need:
2 medium sized steaks {sirloin or tri-tip}
however many shrimp you think you need. {i am the only one who eats shrimp in mine, cale is allergic, so i only needed a few}
2 cups white rice {cook according to it’s packaging}
2-3 bunches of cilantro
1 large tomato
2 large avocados
1 jalepeño
1 medium onion
1 green & red bell pepper
1 can black beans {if you prefer pinto…then use pinto!}
2 tbsp creole seasoning
1 tbsp chili powder
2-3 limes
1 bag of pre-chopped romaine lettuce
salt & pepper to taste

IMG_3798
{one} you’ll want to start your rice first as this takes the longest. i only have a family of 3 so i only needed to make 2-4 servings. i used 2 cups of rice and that was plenty for us.

IMG_3799 IMG_3803
{two} dice up the steaks you chose. i like to use actual steaks because i find that the meat is more tender than the pre-cubed steak that you can buy at the store. i added a little bit of olive oil to both the steak and the shrimp. add 1 tbsp of the creole seasoning and 1/2 tbsp of chili powder to each of the meats you are cooking. add salt & pepper to taste.

IMG_3805
{three} cut your bell peppers into thin slices and cut half of your onion the same and sauté with some olive oil until soft.

IMG_3806
{four} meanwhile, while all of the goodness is cooking away, go ahead and start on your guac & pico. i usually don’t go all out with this guac like i normally would because i am making a separate pico de gallo. so all i used for this was obviously the avocados, a lime and some cilantro. super easy!

IMG_3817
{five} after the guac, make your pico de gallo. all the while, stirring your meats and veggies. for the pico i used; 1 tomato, the other half of the onion, cilantro, a jalepeño, lime juice and salt.

IMG_3807
{six} your rice should be done at this point, so now you will need to squeeze 1 lime and 1 bunch of chopped cilantro into the rice. you may need to add some salt, depending on your preference.

IMG_3809
{seven} get those beans a’cookin’!

IMG_3811
{eight} for the lettuce, i grabbed a bag of pre-chopped romaine lettuce and chopped it even more. i hate iceberg lettuce so i would definitely not recommend buying that.

IMG_3815
{nine} here’s what my spread looked like…kind of like the chipotle bar, right?!

are y’all ready to go down the line… pretend you’re at chipotle…

IMG_3818
white or brown rice? oh i’ll take white, please. 
IMG_3819
what kind of meat? steak and shrimp, thank you!
IMG_3821
oh wait wait…can you add some veggies to that. yeah that’s good thanks.
IMG_3822
{out of order…sorry} black or pinto beans? black beans please.
IMG_3824
mild, medium or hot? mmm let’s do the mild.
IMG_3825
anything else? lettuce and guacamole please. guacamole is ex..YES, IT’S FINE! thank you…

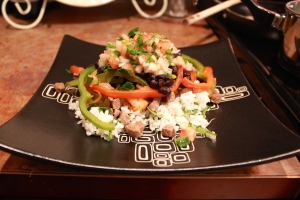
a glorious, homemade chipotle bowl. simply delicious!

always,
-chef jess

pulled pork sammies & spicy coleslaw.

food friday.

well let’s just get down to business.
this is a crockpot recipe, so for all you working mommies, this is right up y’all’s alley.
i’m going to start with the coleslaw first. i found that letting it sit in the fridge overnight really let the jalepeño tastiness come to life!

a big thank you to my neighbor, jessica! she made this coleslaw at one of our neighborhood get-togethers and, while hers was almost too hot for me, i couldn’t stop eating it! so the only credit i take for this recipe is sharing it for the world to enjoy its yummy goodness. thanks, jess!

what you’ll need:
3/4 cup mayo {i used low fat}
1/4 cup white distilled vinegar
1/2 tsp cayenne pepper
2 tbsp sugar
salt & pepper to taste
1 head of cabbage finely chopped
1-2 jalepeños {i used 2}
1 carrot finely chopped
1 bunch of cilantro {chopped}


IMG_3596
{first…& last} errr… mix everything together. haha! should look something this…
refrigerate overnight.

on to the pulled pork sammies.

what you’ll need:
2-3 lb boneless or bone-in pork shoulder
2 medium yellow onions
4 medium size cloves of garlic
1 1/2 cups of chicken stalk or broth
1 tbsp brown sugar
1 tbsp chili powder
1/2 tbsp kosher salt
1/2 tsp cumin
1/4 tsp cinnamon
2 cups of bar-b-que sauce of your choice. {i used sweet baby ray’s}
hamburger buns {i used whole wheat}


IMG_3569
{first} slice up your onions and garlic into thin slices. i (cale) did this the night before so i could just toss them in the crock pot in the morning. i (cale) also did this so i didn’t smell like onion and garlic when i went to work…ew. after the chopping, lay an even layer on the bottom of your crock pot and add the broth.
{i made cale do this for me… i wasn’t even done peeling the crunchy skin off the damn thing and i was bawling! but let me tell you, it was very entertaining watching cale suffer the attack of the onion.}

IMG_3570
{second} mix the brown sugar, chili powder, salt, cumin & cinnamon in a small bowl. pat the pork dry with a paper towel and rub the mixture all over the shoulders.

IMG_3574
{third} place those bad boys in the crockpot on top of the onions and garlic. cover and cook on high for 6 hours or on low for 8-9 hours.

IMG_3576
time to go to work! anyone else have little freak outs when you leave something in the crockpot at home and you’re miles away at work? yep, i know i’m not the only one! see ya in 9 hours!

IMG_3587
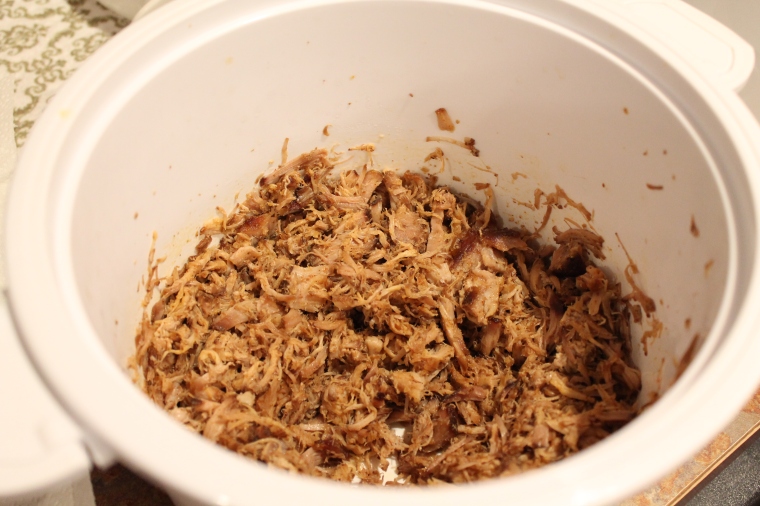
{fourth} welcome home! does your house smell wonderful? so now you need to turn off the crockpot & shred the pork. if you cooked it long enough the meat should just melt right off the bones {if you bought bone-in}. transfer the meat to a cutting board and trim any extra fat. then shred away!!

IMG_3586
{!!!!!!!!!!!}
i FINALLY got to use my pork-n-pull that cale got me for christmas…uhm, awesome!!!

IMG_3590
{fifth} either use a big bowl or a pot {like i did} and put a strainer on top. drain all the broth and fat juice {ew} out of the onions. put the onions back in the crockpot or in a big bowl, just depending on how you want to serve it.

IMG_3591
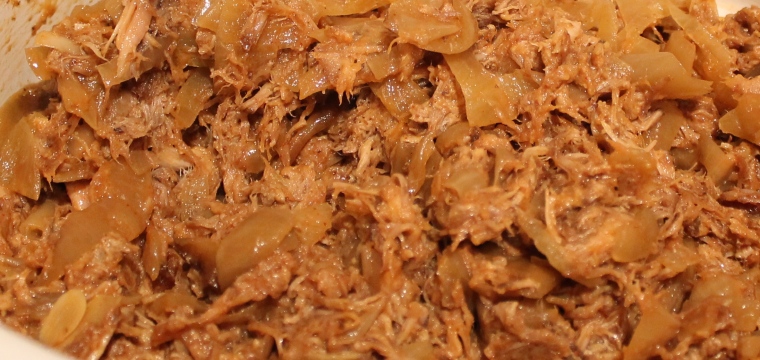
{sixth} add the shredded pork to the onions and add the bar-b-que sauce that you chose. mix mix mix!

and……………… 

IMG_3602

dinner is served, y’all!

hope you enjoyed this recipe! {here}‘s where i got it from, i just tweaked a few measurements.
i love seeing pictures of when y’all try my recipes, so keep those coming!

always,
-chef jess

chicken pot pie

so jaz and i were at costco last weekend and we get so excited to try all the samples that they have out! one of them was a chicken pot pie sample, jaz had never had it before and she loved it!! mommy win!! so we headed over to where the lady pointed us to, and found a pot pie that could a feed an army. seriously this thing was huge!! so i told jaz that i would just make one, and i am so glad i did!

here we go!

what you’ll need:
1 lb of boneless skinless chicken breast
1 cup diced carrots
1 cup frozen peas
1/2 cup celery
2/3 cup of butter
2/3 cup chopped onion
2/3 cup all purpose flour
1/4 tsp pepper {salt to taste}
2/4  tsp celery seed
3-4 cups chicken broth
1 1/3 cup milk
2 refrigerated 9″ unbaked pie crusts


IMG_3283

IMG_3290

{first} preheat your oven to 365º. cube your chicken and add it to a sauce pan along with the carrots, celery and peas add chicken broth to cover. cook for 15 minutes, drain, then set aside.

IMG_3288

{second} cook the chopped onions and butter in a separate sauce pan until translucent. then, slowly add in the flour, 2 cups chicken broth, celery seed, salt & pepper, and milk. keep stirring until it is a thick consistency.

IMG_3291

{third} take one of the pie crusts and lay it in an un-greased 9″ pie dish.

IMG_3292

{fourth} add the chicken/pea/carrot/celery mixture to the bottom of the dish. then add the sauce mixture to the top of that.

IMG_3294

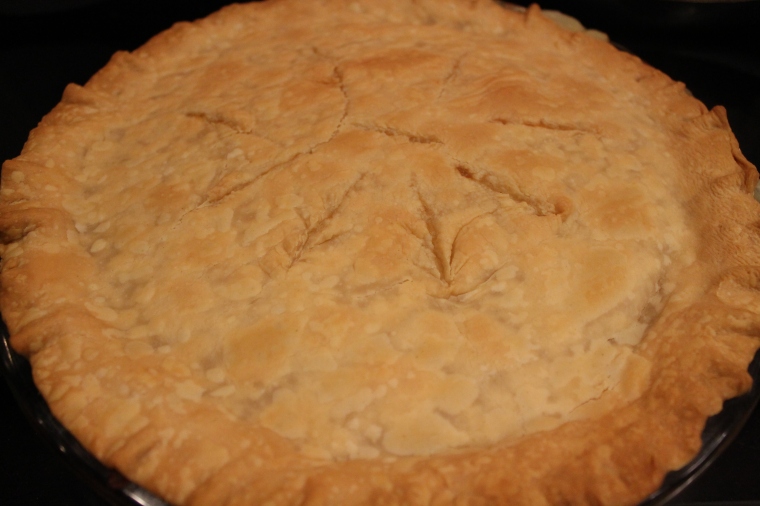
{fifth} cover the goodies with the second pie crust, add some slits for some ventilation, and then pinch the sides to make it pretty! bake it for 40-45 minutes, depending on how hot your oven runs, or until the top crust is golden brown!

IMG_3297

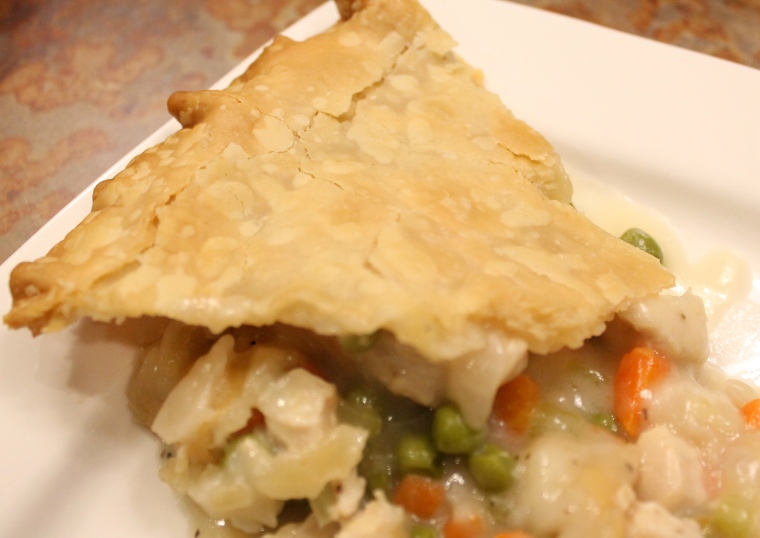
mhmmmmmm, you just made a chicken pot pie! yay for not eating one of those processed ones that comes in box!

IMG_3302

and last but not least! cut out a piece…do a better job than i did when scooping it out {it’s not as easy as it may sound} and enjoy!

always,
-chef jess

creamy chicken tortilla soup

it’s friday and that means it’s food friday with chef jess!
so welcome back & i hope you enjoy this one!

a little back story on this recipe: i actually learned this recipe from jazmyne’s father’s mom. i lived with them while i was pregnant with jazmina and up until she was 1. so i give all the credit to mrs. annie. thank you for sharing such a great soup!

okay, on to the nom noms!
oh, wait let me just say that this is not a health conscious soup…but it’s definitely a hearty one!

IMG_3010

what you’ll need:
2 skinless boneless chicken breast
1 can ranch style beans
1 can chicken broth {i use low sodium}
1 can cream of chicken
1-2 cans of rotel {depending on how spicy you want it}
corn tortillas
mexican blend cheese {i use low fat}
avocados {optional}

{first} start boiling or baking your chicken breasts. this usually takes the most time for this recipe so i like to start it before anything else.

IMG_3018 {second} in a large pot mix together the undrained ranch style beans, chicken broth, cream of chicken, & rotel. bring to a boil then let this simmer on medium/high until the chicken is done boiling/baking.

IMG_2975

{third} i forgot to take a picture of my shredded chicken so here’s a picture from one of my last recipes {gasp…cheater}. say hi to lulu. while the soup is simmering you’ll need to shred your chicken once it is done cooking. it’ll cook a bit more when you throw it in the soup so it doesn’t have to be fully cooked. add the shredded chicken to the soup!!

IMG_3036

{fourth} once you’ve added the chicken in, it’s time to finish this bad boy up! you’ll then want to cut up some corn tortillas {or rip them depending on how much effort you want to put in it} add some cheese on top and let it simmer for 10-15 minutes on low/medium.

IMG_3045

spoon some big ‘ol heaps into a bowl, add some more cheese & avocados if you want! and enjoy some hot soup on a chilly night!

sorry i’ve been on a soup kick lately, but with this cold weather, i feel it’s only necessary!
i hope you enjoyed this food friday!
have a great weekend!

always,
-chef jess